News & Article

Category: Blog

Exterior Washing Mistakes That Reduce Longevity of Your Walls

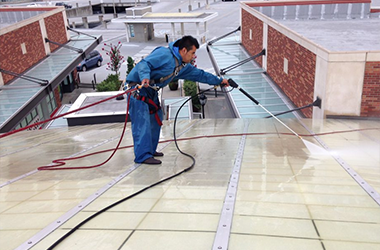
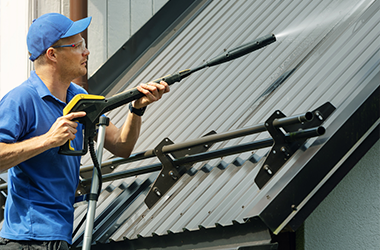
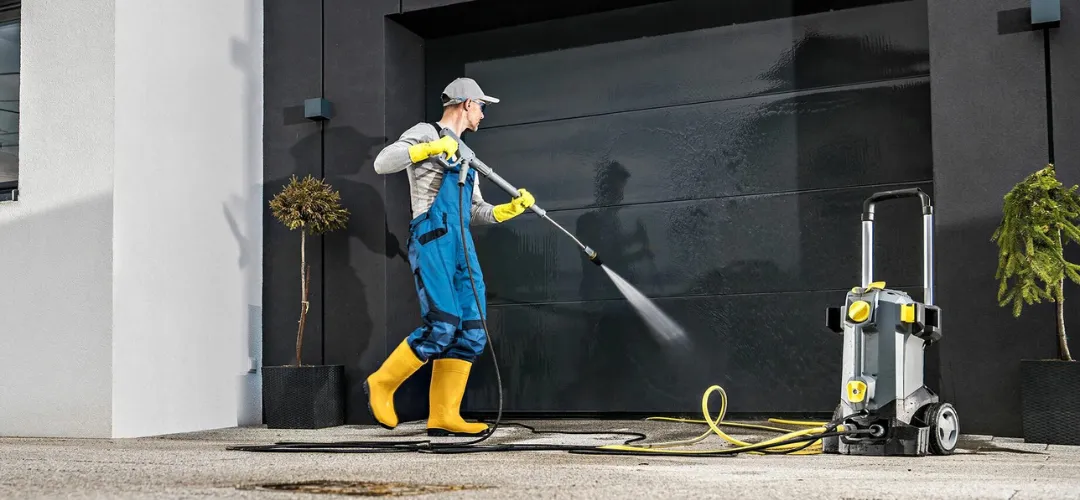
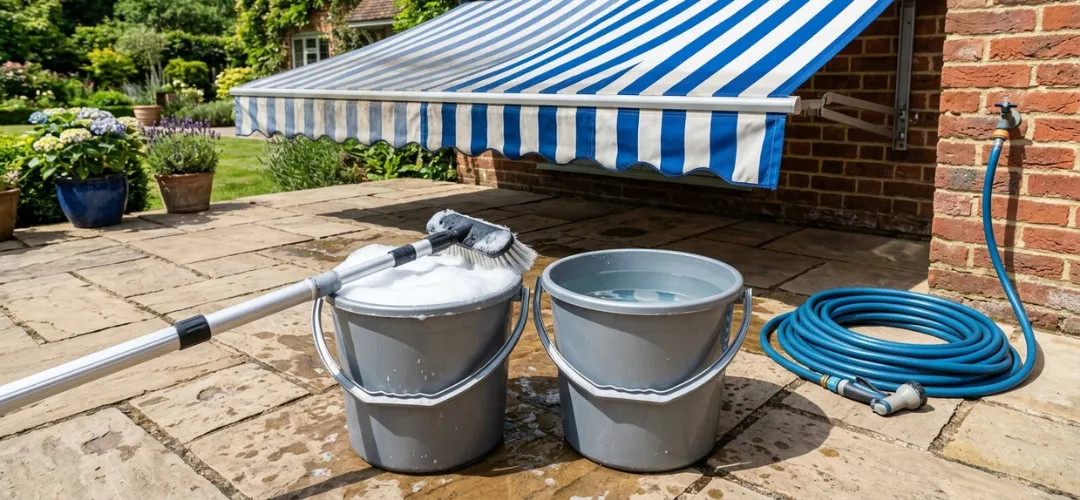
Home You’re standing in your driveway, coffee in hand, when you notice it for the first time in months. That dark streak running down the siding near the gutter, the greenish tint on the north-facing wall that wasn’t there last year. You keep meaning to do something about it, but between work and everything else, it never quite makes it to the top of the list. Here’s the thing about home exteriors. They don’t fail overnight. The changes happen slowly, so slowly that you barely notice until one day you’re standing across the street and realize the house doesn’t look as fresh as it used to. Exterior washing mistakes are usually not dramatic. They’re small decisions that add up over time, and understanding them now can save you from expensive repairs later. If you’ve ever wondered how often you should wash the exterior of your house? or whether your current cleaning routine is helping or hurting, this blog covers the most common errors homeowners make and how to avoid them. Why Exterior Cleaning Matters Think of your home’s exterior like the paint on a car. It takes the brunt of sun, rain, wind, and everything else nature throws at it. Over time, that exposure adds up. Moisture is the real enemy here, because when dirt, algae, and mildew are allowed to settle on walls, they trap moisture against the surface. That trapped moisture seeps into small gaps, freezes in winter, expands, and slowly breaks down whatever it touches. Paint peels. Wood rots. Masonry develops cracks. The process is slow, almost invisible, until suddenly you’re looking at repairs that cost more than a decade of regular maintenance. Home exterior upkeep isn’t just about keeping things pretty. It’s about protecting the materials your house is made from. A well-maintained exterior sheds water properly, resists UV damage, and stays structurally sound longer than one that’s been neglected. So how often should you wash the exterior of your house? For most homes in moderate climates, an annual cleaning is enough to prevent buildup from taking hold. If you live in a humid area, near trees, or close to busy roads where pollution settles, twice a year might be necessary. Climate/Setting Recommended Frequency Moderate, suburban Once per year Humid, coastal Twice per year Heavy tree cover Twice per year Near highways/urban Twice per year Dry, arid Every 18-24 months Mistake 1: Waiting Too Long to Clean Most homeowners clean based on what they can see. If the house looks okay from the street, it must be fine, right? If only it were that simple. The problem is that exterior buildup starts long before it’s visible. Algae and mildew begin growing in shaded areas, corners, and spots that dry slowly after rain. By the time you notice discoloration, these organisms have already been working on your walls for months, trapping moisture against the surface and slowly breaking it down. Dirty house exterior isn’t just about looks. That greenish tint or dark streaking means moisture is being held against your siding, paint, or masonry. Over time, this leads to paint failure, wood rot, and surface deterioration that cleaning alone won’t fix. The solution is simple: clean on a schedule, not based on how things look. If certain areas stay damp longer after rain or seem to darken faster than others, they’re telling you something. So in case you were wondering “What are common exterior washing mistakes?, this is at the top of the list. Mistake 2: Using the Wrong Cleaning Products Grab whatever’s under the kitchen sink and head outside. It happens more often than you’d think. The problem is that exterior surfaces weren’t designed to handle household cleaners. Bleach strips paint, ammonia damages vinyl, and degreasers leave residues that actually attract more dirt. Even some products labeled for outdoor use are too aggressive for certain materials. So what to wash exterior walls with? It depends entirely on what they’re made of. Vinyl siding responds well to mild detergent solutions. Wood needs pH-balanced cleaners that won’t strip protective stains. And brick and stone require gentle, non-acidic formulas that preserve mortar. The right exterior house washing solution matches both the surface and the type of buildup you’re dealing with. Surface Type Exterior House Washing Solution​ Avoid Vinyl siding Mild detergent, specialized vinyl cleaner Bleach, ammonia Wood pH-balanced wood cleaner Pressure washers, bleach Brick/stone Non-acidic masonry cleaner Muriatic acid, high pressure Painted surfaces Gentle soap solution Degreasers, abrasives Windows Professional-grade glass cleaner Ammonia-based products Cleaning exterior of house safely means reading labels and testing products in small, hidden areas first. If you’re unsure, a professional can recommend the right approach without risking damage.  Mistake 3: Overusing Pressure or Force Pressure washers are satisfying to watch. That line of clean advancing across concrete or siding feels like real progress. But here’s the thing: too much pressure doesn’t just clean, it erodes. Power washing exterior of house sounds like the right term, but for most surfaces, “power” is exactly the problem. Vinyl siding develops pitting and cracks under high pressure. Wood gets gouged and splintered. Brick mortar erodes, leaving gaps that invite moisture. Even concrete can be etched and weakened over time. Pressure washing home exterior should be done with caution. The right technique uses the lowest effective pressure, wide spray patterns, and consistent movement. Lingering in one spot, even for a few seconds, can permanently damage the surface. The question can pressure washing reduce exterior wall lifespan? has a simple answer: yes, absolutely. When protective layers are stripped and surfaces roughened, they become more vulnerable to weathering. Stains return faster. Paint peels sooner. Materials that should have lasted decades start failing years early. Exterior washing done right relies more on chemistry and technique than brute force. Soft washing methods use gentle pressure combined with cleaning solutions that lift buildup without damaging what’s underneath. It takes longer, but your walls will thank you. Mistake 4: Treating Cleaning as Isolated, One-Time Tasks A common story we hear goes like this: someone
Read More →
What Happens When You Skip Building Washing for 2 Years

Home You look at your building every day. Maybe you manage a commercial property or own the house you live in. Either way, the exterior starts to blend in after a while. A little dirt here, some streaks there, but nothing worth worrying about, right? Here’s the thing. Two years of skipping building washing doesn’t just mean a dull exterior. It means damage you can’t see building up day after day. What looks like harmless grime is actually eating away at your surfaces, and by the time you notice, the fix costs way more than a cleaning ever would. This blog walks through exactly what happens in that two year window. The hidden decay. The slow creep of mold and moisture. And why answering what happens if you never wash your building exterior might make you pick up the phone sooner than you planned. What Is Building Washing and Why It Matters Let’s start with the basics. Building washing isn’t just pointing a hose at your walls and hoping for the best. It’s a process. Sometimes it’s soft washing for delicate surfaces like painted wood or stucco. Sometimes it’s pressure washing for concrete and brick. The goal is the same either way; remove what shouldn’t be there before it becomes a problem. Professional building wash services cover more than you might think. Siding. Concrete walls. Metal panels. Glass. Even the nooks and crannies where dirt loves to hide. Each surface gets treated differently because what works on brick will destroy wood, and what cleans metal might etch glass. But why bother in the first place? Because long-term dirt buildup on buildings isn’t just ugly. It’s active, it holds moisture against your surfaces, it feeds organic growth. It slowly breaks down paint, sealants, and even the materials themselves. Think of it like leaving a wet sponge against a wooden table for two years straight. Something’s going to rot. Building cleaning and washing services exist for one reason and that is to stop that process before it starts. A clean building stays dry, it sheds water instead of soaking it up, it reflects heat instead of trapping it, and it looks like someone actually cares about the place. Year 1 vs Year 2: What Changes After 24 Months Without Washing Let’s break this down by the calendar. Because two years feels abstract until you see what actually happens month by month. After Year 1 (The Quiet Phase) The first year without washing is sneaky. You probably won’t notice much day to day, but slowly, a film builds up on your siding. Pollen settles into every tiny pore. Exhaust residue from passing cars clings to walls facing the street. Rain hits the surface and instead of beading up and running off, it spreads out and hangs around. That trapped moisture is the real problem. It doesn’t look like much yet. Just some darker patches that dry eventually. But every time that happens, you’re one step closer to premature exterior aging, with surfaces that should last decades start showing wear in years instead. After Year 2 (The Damage Phase) Now things get visible. That faint film from year one has turned into something thicker. Algae and fungus on building surfaces start showing up as dark streaks, especially on north facing walls or anywhere shade lingers. Greenish black lines running down your siding aren’t just ugly, they’re feeding on your building. The long-term effects of neglected building cleaning start looking less like theory and more like your actual reality. Paint that should still look fresh begins to chalk or fade. Caulking around windows and seams dries out faster because contaminants break it down. Wood trim starts feeling soft in spots instead of solid. Here’s the thing about year two. Nothing screams yet. No boards falling off. No gaping holes. But under the surface, your building is changing, and none of it is changing for the better. Major Damage That Occurs After Skipping Building Washing for 2 Years Now let’s get specific. Two years of neglect doesn’t just mean your building looks tired. It means active damage happening in multiple ways at once. Mold and Mildew Growth on Exterior Walls Shaded walls. North facing sides. Areas behind trees or near constantly damp ground. These are where mold and mildew growth on exterior walls starts first. At first it’s just spots. Little dark flecks that might scrub off if you caught them early. But by year two, those spots spread. They dig into porous surfaces like wood and stucco. They leave stains that don’t come off with a garden hose. And every time it rains, they get a fresh drink and grow more. Algae and Fungus on Building Surfaces Algae is different from mold. It’s often darker, almost black, and it loves moisture even more than shade. You’ll see it streaking down walls in long lines, especially below rooflines where water runs off. Algae and fungus on building surfaces don’t just stain. They eat. Certain types actually break down organic material in siding and paint. Leave them long enough and your finish deteriorates from the outside in. Moisture Damage to Exterior Materials Here’s where things get structural. When dirt and organic growth hold water against your building, that water goes to work. Paint blisters and peels because moisture pushes it off from behind. Wood swells and softens. Masonry absorbs water that freezes and expands in winter, cracking tiny fissures into larger gaps. Moisture damage to exterior materials is the slowest moving disaster on this list, but also the most expensive when it finally shows up. Rot and Corrosion on Exterior Structures Wood rot doesn’t happen out of the blue, it takes time. But two years of trapped moisture is plenty of time for spores to take hold and start digesting your trim, your window frames, your porch columns. Metal faces its own enemy; rust. Galvanized steel and aluminum might resist for a while, but constant moisture and airborne pollutants break down their protection. Once rust starts,

Read More →
Top 5 Reasons Businesses Schedule Professional Building Washing

Home You notice it every time you pull into the parking lot. That dark streak running down the concrete near the entrance. The patch of greenish-black on the south wall that’s been spreading for months. You keep meaning to do something about it, but between payroll, permits, and keeping the lights on, exterior cleaning somehow never makes it to the top of the list. Here’s the thing about commercial properties: they take a beating from the elements day after day. Sun, rain, wind, and pollution all leave their mark, and before you know it, what was once a crisp, professional building starts looking tired and neglected. Why should businesses schedule professional building washing? Because first impressions matter, and your building speaks before you do. How can regular building washing benefit businesses? The answer goes far beyond looks. From protecting your investment to keeping visitors safe, professional building washing delivers returns that show up on your bottom line. This blog covers five reasons smart businesses put it on the calendar. 1. Preserve and Enhance Curb Appeal Think about the last time you walked past a building with grime streaking down its walls or dark patches spreading across the concrete. You probably didn’t think “they must be busy running a business.” You probably thought the place looked neglected. Commercial building cleaning isn’t just about vanity. It’s about the message your property sends to everyone who passes by. Potential clients, future employees, and even current customers all make judgments based on what they see from the street. But can building washing improve client impressions? Absolutely. Studies show that people form opinions about a business within seconds of seeing its exterior. That dirty streak you’ve been ignoring might be the very thing costing you a new contract. For retail stores, office buildings, schools, and medical facilities, the math is simple. Cleaner buildings attract more foot traffic. More foot traffic means more opportunities. And more opportunities mean growth you can actually measure. 2. Protect Your Building and Avoid Costly Repairs That greenish-black patch on your south wall isn’t just ugly. It’s continuously damaging your property. Mold, mildew, and algae don’t just sit on the surface. They eat into whatever they’re attached to, whether that’s brick, concrete, stucco, or wood. Over time, organic growth causes paint to peel, surfaces to pit, and materials to deteriorate faster than they should. Pressure washing commercial buildings removes these contaminants before permanent damage sets in. Think of it as preventive maintenance for your largest asset. A few hundred dollars spent on cleaning today can save tens of thousands in repainting, residing, or concrete repair later. Professional exterior washing also reveals problems you might not notice otherwise. Cracked caulking, loose mortar, or damaged siding become visible once the grime is gone, and finding these issues early means fixing them while they’re still small.  3. Promote Health, Safety, and Compliance Slippery sidewalks aren’t just a maintenance issue. They’re a lawsuit waiting to happen. Algae and mildew buildup on walkways, entrances, and parking lots creates hazardous conditions for everyone who visits your property. One rainy morning, one hurried employee, one fall, and suddenly you’re dealing with workers’ compensation claims or personal injury attorneys. Routine commercial exterior cleaning eliminates these risks before anyone gets hurt. What is the purpose of cleaning schedules? Beyond looks, they’re about protecting people. Schools, medical offices, and retirement centers have even higher stakes. Vulnerable populations like children and the elderly are more susceptible to slips, and regulatory bodies take a dim view of preventable accidents. Air quality matters too. Mold and pollutants clinging to exterior walls don’t stay outside forever. They find their way into ventilation systems, recirculating through offices and affecting anyone with respiratory issues. Regular soft wash commercial buildings treatments remove these contaminants at the source, keeping indoor air cleaner and occupants healthier.  4. Enhance Employee Morale and Client Confidence Nobody feels proud walking into a building that looks forgotten. There’s a psychological effect that clean spaces have on people. When employees arrive at work and see a well-maintained exterior, it signals that their employer cares about the details. That translates into how they treat the workspace and, by extension, how they treat customers. Commercial building pressure washing does more than remove dirt; it removes the message that no one’s paying attention. Clients pick up on this too. Walking into a property with sparkling sidewalks and fresh-looking walls builds confidence before anyone says a word. Building cleaning & washing services also show tenants and visitors that you take their experience seriously. For property managers, this means higher retention rates and fewer complaints. For retail businesses, it means customers stay longer and come back more often. When you invest in professional building washing services, you’re investing in perception. And in business, perception is often reality. 5. Maximize Asset Longevity and Value Your commercial building is likely one of the biggest investments you’ll ever make. Treating it like one means thinking beyond this year’s budget. Dirt, pollution, and organic growth don’t just sit on the surface, they actively work against your property’s lifespan. Acidic pollutants eat away at paint and sealants. Trapped moisture accelerates corrosion on metal fixtures. Algae roots dig into porous surfaces like brick and concrete, causing flakes and spalls that require expensive repairs. Scheduling regular building washing services throughout the year prevents this slow-motion deterioration. Think of it as flossing for your property—not the most exciting task, but one that prevents major work down the road. A professional building wash services plan also makes sense from a budgeting perspective. When you know what’s on the calendar, you can plan accordingly. No surprises. No emergency funds drained because someone finally noticed the south wall is crumbling. How Often Should Commercial Buildings Be Cleaned? There’s no single answer that fits every property, but most commercial buildings benefit from professional washing at least once a year. Some need more. So how often should commercial buildings be cleaned? It depends on several factors.  Location  Location matters significantly. Buildings near

Read More →
Stop Ruining Your Awning: 6 Cleaning Mistakes Homeowners Make

Home You notice it every time you pull into the driveway. That dark stain near the seam. The patch of green you’re pretty sure is mold. You keep meaning to clean it. Then life happens and the stain doesn’t go anywhere. Here’s the thing. You’re not alone in wondering What is the best thing to clean awnings with? or if that bleach you’ve been using is actually helping or just making everything worse. Because let’s be honest; nobody wants to spend their Saturday scrubbing only to watch the grime return in three weeks. What can I use to clean awnings? The answer matters more than you think. Get it wrong and you’re not cleaning, instead you’re slowly destroying it. This blog covers six mistakes that damage awnings and exactly how to fix them. Mistake #1: Using High Pressure or Scrubbing Too Hard You borrowed your neighbor’s pressure washer. He said it could clean concrete. You figured an awning is basically fabric concrete, right? Wrong. What not to do when cleaning awnings starts here. High pressure doesn’t lift dirt—it blasts it through the fabric. Those tiny pinpricks of light you notice later? That’s not the sun shining through, but actually destroyed waterproof coating and weakened threads. The same goes for scrubbing. A stiff brush and elbow grease feels productive. It’s not. It’s sandpaper on fabric. Avoiding awning fabric damage means understanding that gentle works better than aggressive. Use a soft bristle brush. Let soap do the work, not friction. Rinse with a regular garden hose—no nozzle cranked to jet mode. Mistake #2: Using the Wrong Cleaner You grabbed whatever was under the kitchen sink. Bleach. All purpose spray. That industrial degreaser you bought for the grill. It killed the dirt but it also killed your awning. Can you use vinegar to clean awnings? It’s a common question, and the answer depends on your fabric. Vinegar is acidic. On canvas, it can weaken fibers over time. On vinyl, it can cause stiffness and cracking. On aluminum frames? It can strip protective coatings. Best canvas awning cleaner options are gentle, pH neutral, and specifically designed for outdoor fabric. Products like Dreft, Ivory Snow, or Woolite mixed with water work well. And though cleaning canvas awnings with vinegar might seem like a natural hack, natural doesn’t always mean safe. Stick to what the manufacturer tested. Your awning came with care instructions for a reason.  Mistake #3: Ignoring Mold and Mildew Early That little black speck you noticed last month? The one you told yourself you’d get to next weekend? It’s not little anymore. Mold and mildew don’t stay put. They spread and eat into fabric fibers. They leave permanent stains that no amount of scrubbing can erase. And in humid climates, they move fast. How to scrub mildew and mold off awning fabric starts with timing. Catch it early and you’re cleaning. Catch it late and you’re replacing. How to clean an awning with mold requires a two-step approach. First, dry brush the area to remove loose spores. Then apply a mildew-specific cleaner—products like Star Brite or a diluted vinegar solution for minor cases. Let it sit. Rinse thoroughly. Never scrub dry mold; you’ll just grind it deeper into the weave. Removing mold from awnings isn’t rocket-science. It just requires attention. Ignoring it is the expensive part.  Mistake #4: Letting Dirt, Leaves and Debris Sit Too Long That pile of leaves in the corner? The bird droppings you’ve been meaning to hose off? The tree sap that landed three weeks ago? Every day they stay, they bond with your fabric. Leaves stain. Bird droppings are acidic and eat through waterproof coatings. Tree sap hardens into something that feels permanent because it basically is. What could have been a five minute rinse turns into a deep cleaning job. Proper awning maintenance isn’t glamorous. It’s walking around your house once a week with a hose. It’s brushing off debris before it settles in. It’s five minutes of prevention versus three hours of scrubbing. Extending awning lifespan comes down to one simple habit: don’t let stuff sit. Debris left unattended traps moisture, breeds mold, and adds weight that stresses your awning frame. Clean it when you see it. Not when you remember it. Mistake #5: Cleaning Unsafely You’re ten feet up. One hand holding the hose. The other gripping a scrub brush. Your phone is wedged between your ear and shoulder because you’re also “just quickly” returning a call. The ladder wobbles. You grab the awning frame to steady yourself. Bad idea. For you and the awning. Knowing how to clean an awning safely starts with what your grandfather should have told you: never lean sideways off a ladder. If you can’t reach the center of your awning without stretching, your ladder is in the wrong spot or you need the right equipment. Awning cleaning tips don’t help if you’re in traction. Use a sturdy step ladder on level ground. Keep your hips between the rails. Wear grippy shoes. And for awnings above ground level, second story, storefronts, anything requiring an extension ladder, stop being a hero. Some cleaning jobs aren’t DIY.  Mistake #6: Cleaning Too Rarely You wait until the awning looks dirty. By then, the damage is already done. Stains have set. Mold has anchored. That green patch you’ve been ignoring? It’s been growing for months, slowly eating into the fabric’s fibers. What could have been a quick rinse is now a restoration project. How often should you clean your awning? The answer isn’t “when it looks bad.” It’s every three to six months, depending on your climate. More if you’re near trees. More if you’re in a humid area. More if birds have apparently declared war on your property. Most awning cleaning mistakes almost always trace back to one root cause: waiting too long. Monthly hose downs prevent everything else. Quarterly deep cleans reset the clock. And annual professional inspections catch what you missed. Mistakes that damage awnings aren’t always what you do.

Read More →
7 Custom Awning Ideas That Upgrade Shade and Curb Appeal

Home Custom awnings change how a home looks, feels, and functions. Shade becomes easier to control, outdoor spaces become usable again, and the front of the house starts looking more polished. First, comfort increases. Then, energy savings follow. Finally, curb appeal improves in a way that feels natural instead of forced. This guide explains creative awning ideas, while also showing how to choose, install, and maintain them with confidence. Why Custom Awnings Upgrade Both Comfort And Style Custom awnings are designed to fit exact spaces, so they feel like part of the house rather than something added last minute. Because they block harsh sunlight, protect doors, and shape outdoor areas, they create value from multiple directions at once. Next, let’s explore the best ideas that blend shade, design, and practicality. 1. Modern Retractable Patio Awnings Retractable systems give control over sunlight. You extend the shade when heat rises, then close it back when open sky feels better. Why people choose retractable awnings Flexible shade control Ideal for gatherings and dining Protects outdoor furniture Therefore, patios transform from “too hot” places into comfortable social spots. 2. Stylish Window Awnings Window awnings reduce glare and help rooms stay cooler. Because less sun enters, furniture fades slower and air conditioners rest more often. Design considerations Contrast colors for bold effect Soft neutral tones for subtle style Curved or flat frames depending on architecture Window awnings also add rhythm to the façade, creating structure across the front of the house. 3. Entryway Awnings That Welcome Guests The front door becomes more inviting when shaded. Visitors stay dry during rain, and the door stays protected from sun and weather. Entryway awning benefits Preserves paint and finishes Keeps guests comfortable Defines the entrance visually First impressions begin here, so a well-chosen entry awning upgrades the whole exterior. 4. Pergola-Style Shade Structures Pergola-style awnings combine framework with shade panels. The result feels architectural instead of decorative. Great uses Outdoor lounges Barbecue zones Poolside relaxation areas These spaces feel intentional, because the shade becomes part of the overall layout. 5. Custom Fabric Awnings With Texture And Personality Fabric awnings bring softness and character. Stripes, muted tones, or custom patterns help connect outdoor style with interior décor. Why they work well Lightweight appearance Easy fabric replacement later Suitable for classic homes Texture adds warmth, so ordinary windows turn into design features. 6. Sleek Metal Canopy Designs Metal canopies create strong lines and a contemporary look. They resist weather and require little maintenance, which makes them great for busy homeowners. Best suited for Modern architecture Minimalist homes Urban properties The result feels bold, but still elegant. 7. Walkway And Side-Yard Awning Extensions Side yards often stay unused because they feel exposed. Covered walkways change that experience. Benefits Weather-safe walking paths Protection for garbage bins or bikes Cleaner, safer movement around the house Suddenly, forgotten spaces start serving a purpose. Complete Guide: How To Choose The Right Custom Awning Understanding ideas is helpful. Choosing correctly matters even more. Follow this simple framework. Step 1: Understand Sun Direction Observe how sunlight hits the house during morning and afternoon. Therefore, shading becomes strategic instead of random. Step 2: Decide The Main Purpose Different awnings do different jobs. Shade for sitting areas Protection for doors Cooling for windows Coverage for walkways Clarity here prevents regret later. Step 3: Select The Right Material Each material behaves differently. Fabric: softer look, flexible design Metal: durable, modern style Polycarbonate panels: lightweight and strong Choose based on weather, style, and maintenance preference. Step 4: Match Style With The House Design harmony matters. Oversized awnings or clashing colors can ruin the look. Think about: Roof color Trim tone Shape of windows and doors When everything aligns, the awning feels built-in. Step 5: Plan Professional Installation Poor installation leads to sagging, leaks, and wind damage. Therefore, measuring, anchoring, and alignment must be accurate. Step 6: Think Long-Term Maintenance Some awnings wipe clean easily. Others require seasonal care. Maintenance basics Brush dust regularly Rinse dirt buildup Check brackets after storms Good care keeps them looking new. Quick Comparison Overview Awning Type Best Location Main Benefit Retractable Patios and decks Adjustable shade Window Sun-exposed windows Cooler interiors Entryway Front doors Welcoming look Pergola-style Outdoor rooms Structured shade Fabric Decorative areas Style and softness Metal canopy Modern homes Bold durability Walkway cover Side paths Protection while walking Everything works together to create better comfort and stronger curb appeal. When homeowners upgrade awnings, many also explore outdoor living upgrades or patio remodeling because these projects connect closely. Adding internal links inside related paragraphs keeps readers exploring naturally instead of forcing them to search around. Final Thoughts Custom awnings transform how your home looks and lives. From retractable patio shades to sleek metal canopies and welcoming entry covers, each choice adds comfort, protection, and style. When shade fits your space this well, the whole property just feels more finished. Ready for something that actually works with your home? The Awning Cleaners specializes in Awning Making Services, delivering custom designs built around your needs and imagination—so you get quality that fits without compromise. Call (323) 273-3058 or visit https://cleanmyawning.com/awning-making/ to get started. FAQs What color awning is best for shade? Dark colors block more sunlight and provide the best shade, but lighter colors reflect heat better. For maximum cooling, go dark on top and light underneath. How to make a custom awning? Start by measuring your space, choosing a frame material (aluminum or steel), and selecting fabric or cover material. Professional fabricators then cut, weld, and sew your design to exact specifications. What are the different types of awnings? Common types include retractable patio awnings, fixed window awnings, entryway canopies, pergola-style structures, metal awnings, and walkway covers. What type of awning is best? It depends on your goal. Retractable awnings offer flexibility, fixed awnings provide constant protection, and metal canopies deliver maximum durability. Match the type to your specific space and how you plan to use it. How much is a custom retractable awning? Prices

Read More →
10 Signs Your Home’s Exterior Needs a Deep Clean

Home Ever give your house exterior a good, long look and think, “Huh, it looks… tired”? You’re not imagining it. Day after day, your home’s walls stand guard against sun, rain, and dusty winds. It’s no wonder they eventually need a spa day. But if you’re wondering, “How do I know when my home’s exterior needs a deep clean?” – you’ve come to the right place. Let’s put it this way. That dirty house exterior isn’t just about the way it looks. That layer of dust and dirt buildup is like a sponge, holding dampness against your siding. And where there’s consistent moisture, trouble isn’t far behind. The good news? Your home talks to you. It gives off clear signals when it’s time for a wash. By learning to spot these 10 signs early, you can save yourself a ton of hassle and keep your home looking sharp and standing strong for years to come. Importance of Cleaning Your Home’s Exterior  Think of your home’s exterior like your own skin. You wash it not just to look presentable, but to stay healthy. It’s the same for your siding, brick, and roof. A proper home exterior washing routine does three big jobs, and missing them is where many homeowners get caught off guard. First, it’s your home’s shield. That layer of grime we just talked about? It cuts through your home’s exterior. Over time, it can wear down paint and sealants, leaving the actual materials underneath exposed to the elements. This is what leads to weathered exterior materials – think of it like a small scratch on your car that turns into a rust spot. A timely wash is the best polish for that. Second, it stops small problems from moving in. That damp “sponge” of dirt is a five-star hotel for spores and microorganisms. It’s the first step toward the mold on exterior walls and algae on siding we’ll dive into in the next sections. And third, yes, it makes your home glow. Curb appeal isn’t just a fancy term; it’s that feeling of pride when you pull into the driveway. More practically, it protects your property’s value. And now that you know what happens why, let’s look at the 10 specific signals your home is sending, starting with the most obvious one you’ve probably already noticed. 10 Signs Your Home’s Exterior Needs a Deep Clean Sign 1: Stained or Grimy Siding Go ahead, run your hand along your siding. Feel that? It’s not supposed to feel like sandpaper. That gritty texture means dirt isn’t just sitting there anymore—it’s becoming part of the surface. Your house is literally wearing its grime like a second skin, and it’s the first quiet way it asks for a wash. Left alone, this constant abrasion is what slowly strips life from your paint or vinyl, leading to the faded, tired look we all want to avoid.  Sign 2: Mold, Mildew, or Algae Growth Take a look at the side of your house that doesn’t get much sun. See those green streaks or black speckles creeping up from the garden bed? That’s not a trick of the light—that’s mildew on home surfaces and algae setting up shop. They love the damp, shady spots your house offers, especially when there’s a layer of dirt for them to snack on. Think of it like finding mold in your shower. You wouldn’t just ignore it, right? It’s the same outside. These growths aren’t just ugly; they can make the air around your house feel stuffy and trigger allergies. Plus, they hold moisture right against your paint and siding, which is a one-way ticket to the peeling and cracking we’ll talk about later. Sign 3: Visible Dirt and Dust Buildup You know that film you wipe off your car? Your house gets it too. But you don’t wash your house every week. Over months, that dust and dirt buildup from the road and fields cakes on. It’s why your white siding looks dingy grey from the street. This layer isn’t harmless. It’s like wearing a dirty raincoat—it traps moisture against your siding instead of letting it bead off. That trapped dampness is what leads to bigger issues, like the stains and growth we’ve already seen.  Sign 4: Stained Brick, Stucco, or Concrete Notice rusty orange streaks or a weird chalky white film on your brick or stucco? That’s not supposed to be there. Those stains are telltale signs of problems hiding behind the surface, like a leaky gutter or trapped moisture. Stained brick or stucco means your home’s materials are under stress. You can’t just paint over it or ignore it. Getting it properly cleaned is the first step to finding and fixing what’s actually wrong. Sign 5: Faded or Discolored Paint Has your once-bright blue siding turned a dull grey-blue? That’s not just the sun. Faded or discolored paint happens when dirt, pollution, and those green growths we talked about block the sun and eat away at the color pigments. When paint fades, it’s not just an eyesore—it’s getting thin. That means the wood or siding underneath isn’t as protected from rain and sun. A deep clean can often restore the vibrant color and give your existing paint more life. Sign 6: Clogged Gutters and Downspouts Look up. Are your gutters sagging, spilling over, or filled with plants? Clogged gutters and downspouts are a major red flag. When they’re blocked, rainwater has nowhere to go but over the sides, pouring down your freshly cleaned walls and pooling around your foundation. This constant waterfall causes most of the stains and water damage you see. Cleaning your gutters is crucial, and it’s the perfect time for a full home exterior power washing to handle the mess they’ve made down below.  Sign 7: Weathered or Damaged Exterior Materials This is a big one. If you press on a window sill or a piece of trim and it feels soft, or if your paint is bubbling up like bad wallpaper, water

Read More →
9 Pressure Washing Tips for Driveways, Patios and Siding

Home Alright, let’s be honest. Is your driveway sporting more oil stains than a mechanic’s shop? Does your patio feel slick with green algae, and does your house siding look like it’s wearing a coat of gray grime? If you’re nodding yes, you’re probably asking yourself, “What are the best pressure washing tips for driveways, patios, and siding to fix this myself?” Great question. And you’ve come to the right place. Think of this as your go-to guide, written not like a textbook, but like a chat with a neighbor who’s done this a hundred times. We’re going to walk through nine straightforward steps that cut through the confusion. The goal is to help you clean those surfaces without a single costly “oops.” So, grab a coffee, and let’s get your home’s curb appeal back, one simple tip at a time. Before You Start: What to Know About Pressure Washing You wouldn’t use a sledgehammer to hang a picture, right? In the same way, pressure washing isn’t a one-size-fits-all blast of water. It’s a tool, and getting to know it is your first step to a job done right. Think of your driveway, patio, and siding as different family members. Your concrete driveway is the tough, resilient one. Your wooden or composite patio is a bit more sensitive. And your house siding, whether vinyl or brick, is the most delicate of the three. They all need cleaning, but they each require a slightly different approach. Why does this matter? Because the most common mistake isn’t under-cleaning, it’s over-powering. Knowing these basics now will make every single tip that follows make perfect sense.  Top 9 Tips for Pressure Washing​ Tip 1: Choose the Right Pressure & Nozzle for Each Surface Before you pull the trigger, let’s talk gear, because this is where most DIY dreams go sideways. Pressure washer tips aren’t just about technique; they begin with understanding your machine’s settings and that little screw-on nozzle. The numbers matter: PSI is your power (like how hard you scrub), and GPM is your flow (how much water helps rinse the dirt away). For siding, you’ll want lower PSI and a wider fan; for a driveway, you can bring in more power. So, what’s the first move? Always match the nozzle to the surface. A green (25-degree) tip is your best all-around friend for patios and driveways. For siding, start with a white (40-degree) tip for a gentler touch. Getting this right from the start is the absolute foundation for everything else we’ll cover next. Tip 2: Pressure Washing a Driveway Concrete is tough, but it’s not invincible. The key to learning how to pressure wash a driveway is combining the right pressure with smart movement. If you’re wondering, “What are the best tips for pressure washing driveway​?” start using a stronger nozzle, but keep the wand tip about a foot away and use long, overlapping sweeps, as if you’re mowing the lawn. This prevents ugly circular etch marks. Start at the top of the slope and work your way down so dirty water isn’t running over your clean work. And for those stubborn oil spots? Don’t just blast them. Let’s talk about pre-treating in a bit. Mastering this approach is what turns a messy job into a clean, uniform finish that looks professionally done. Tip 3: Patio Pressure Washing Tips for Stone, Pavers & Concrete Alright, so your patio looks like it’s been in a mossy wrestling match. Now, your first thought might be to hit it with the same power you’d use on the driveway, but hold up! Pressure washing your patio is a different game entirely; think of it more like washing a car than hosing down a sidewalk. You want to clean it, not accidentally strip or damage it.  So, if you’re doing patio cleaning with pressure washer​, start by always sweeping off leaves and dirt first. Then, switch to that wider white nozzle we chatted about earlier, and whatever you do, keep the spray moving. Never let it linger in one spot. This gentle, consistent motion is exactly how you knock out that slippery algae without etching the stone or washing away the important sand between your pavers. Tip 4: The Right Way to Pressure Washing House Siding Let’s talk about your home’s siding, since this is where the most costly “oops” moments happen. People often ask, “What is the best tip for pressure washing siding?” and the answer is to go low and slow. Use the lowest effective pressure, often with that 40-degree white nozzle, and always spray at a downward angle. This cleans the surface without forcing a single drop of water up behind the panels, which is a one-way ticket to mold and rot. Now, this leads perfectly into another big question: “What not to do when pressure washing siding?” Never use a ladder with a pressure washer in your hands (the kickback can be dangerous), and absolutely avoid using a turbo or zero-degree nozzle. It’s like using a scalpel for a job that needs a soft brush. Following these two rules alone will keep your siding intact. Tip 5: Apply Detergent & Rinse in the Correct Order  Now, let’s talk about giving your surfaces a deep clean with detergent. This isn’t just about adding soap; it’s about a pattern of how you do things. Whether you’re tackling patio cleaning with a pressure washer or your home’s exterior, the rule is to apply soap moving up, and rinse with water moving down. Why? Applying from the bottom up prevents streaking, as the soap doesn’t immediately run down dry, dirty surfaces. When it’s time to rinse, start from the top and work down. This washes all the soap and loosened grime downward and off the surface in a clean flow. It’s a simple flip in direction that makes a world of difference in getting a spotless, streak-free finish on your patio, driveway, or siding. Tip 6: Keep the Wand Moving & Maintain Distance Here’s a

Read More →