News & Article

Category: Blog

5 Building Surfaces That Require Soft Washing Instead of High Pressure

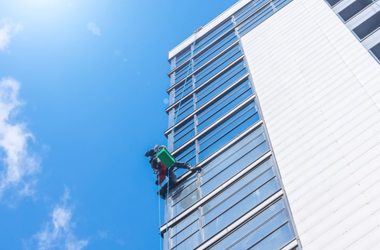
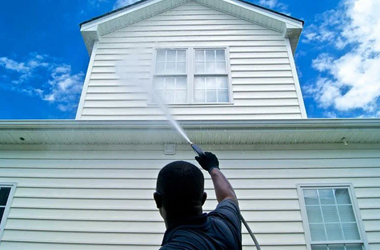
You rent a pressure washer for the weekend, feeling like a superhero with a power wand. The driveway looks incredible. Emboldened, you turn that roaring nozzle toward the side of your house, and within seconds a strip of paint peels off like sunburned skin. Now you’ve got a bright new patch of bare wood and a sinking feeling in your gut. Here’s the thing. Not every surface can handle brute force. A blast of water strong enough to strip concrete will happily tear through siding, gouge stucco, and rip shingles right off your roof. What felt like progress turns into a repair bill. So which surfaces need a gentler touch? This guide walks through five building materials that demand soft washing instead of raw power, why they break under pressure, and how to clean them without leaving a mark. By the end, you’ll know exactly when to ease off the trigger. What Soft Washing Actually Is and Why It Matters Before we get to the list, let’s clear up the confusion. Soft washing isn’t just pressure washing turned down a notch. It’s a different approach entirely. Instead of relying on force, soft washing uses a specialized detergent and a gentle surfactant to break down grime at the source. The cleaning solution does the heavy lifting, dissolving mold, algae, and mildew right down to the root. Then a light rinse carries everything away. No gouging, no stripping, no damage. Think of it like the difference between scrubbing a delicate shirt versus sandblasting it. Low-pressure washing cleans by chemistry, while its aggressive cousin cleans by muscle. One respects the material. The other bulldozes through it. Why does this matter so much? Because using the wrong method costs you twice: once for the botched cleaning and again for the repair. Choosing the right technique protects your property value, your curb appeal, and your wallet all at once. Here’s a quick side-by-side to make the difference obvious: Feature Soft Washing High-Pressure Method Cleaning power Detergent and surfactant Water force alone Water pressure Roughly 100 PSI or less 1,500 to 4,000 PSI Best for Delicate, painted, porous surfaces Concrete, driveways, hard masonry Kills organisms Yes, at the root No, just blasts surface layer Risk of damage Very low High on soft materials That last row is the whole point. When the surface is fragile, gentle wins every time. 1. Painted Wood Siding Start with the classic mistake. Painted wood siding looks tough, but it’s one of the easiest surfaces to wreck with too much force. Wood is porous and flexible, and paint is essentially a thin protective skin sitting on top. Hit it with a concentrated jet and that skin peels, splinters, and lifts. Worse, the water forces itself behind the boards, soaking the wood and creating the perfect breeding ground for rot and mold you can’t even see. What surfaces can you not pressure wash? Painted wood tops the list. The damage often shows up weeks later as bubbling paint, warped planks, or a musty smell creeping through the walls. Soft washing handles it beautifully instead. A low-pressure application of detergent lifts dirt, cobwebs, and mildew without touching the paint layer. A gentle rinse finishes the job, leaving siding that looks freshly painted without a single stripped board. Signs your siding needs the soft touch: 2. Stucco Stucco has a reputation for being rugged. It’s cement-based, after all. But that reputation gets a lot of homes into trouble. The problem is that stucco is porous and prone to hairline cracks you may not even notice. Aim high-pressure water at it and you’ll drive moisture deep into those cracks, widening them and loosening the finish. Chunks can literally blow off the wall, leaving pockmarks and exposed patches that invite even more water damage. So can you pressure wash stucco safely? Not without real risk. The textured surface traps dirt and organic growth, which tempts people to crank up the power to blast it clean. That’s exactly the wrong instinct. A softer approach works far better here. The right detergent seeps into the texture, kills the algae and mildew living in the pores, and lifts staining without disturbing the finish. This kind of building washing without surface damage keeps the wall intact while restoring that clean, uniform look. Then a controlled rinse washes the grime away without forcing water where it doesn’t belong. 3. Roof Shingles and Tiles Your roof might be the most expensive surface on your entire property, and it’s shockingly easy to destroy with a wand. Asphalt shingles are coated with protective granules that shield your home from UV rays and weather. Blast them with force and those granules wash straight into the gutter, shaving years off the roof’s life. High pressure can also lift shingle edges, crack roof tiles, and drive water under the layers where leaks are born. That’s a lot of damage for a cleaning job. Those ugly black streaks running down a roof? They’re a hardy algae called Gloeocapsa magma, and force alone won’t kill it. You have to treat it chemically, which is exactly what soft washing does. Here’s why gentle cleaning is the only smart choice for a roof: Never point pressure washing equipment at a roof. The short-term shine isn’t worth the long-term leaks and the shortened lifespan of a very costly investment. 4. EIFS and Dryvit Synthetic Stucco If your building has EIFS, also called Dryvit or synthetic stucco, you’re dealing with one of the most delicate exteriors out there. EIFS is a multi-layer system built over foam insulation board, finished with a thin synthetic coating. It looks like traditional stucco but behaves nothing like it. That outer layer is soft, and a strong jet of water will dent, crack, or puncture it in an instant. Once water breaches that coating, it gets trapped against the foam and creates hidden moisture problems that are miserable and expensive to fix. This is textbook territory for gentle methods. A good alternative to pressure washing exists precisely
Read More →
The 2-Bucket Cleaning Method Professionals Use for Delicate Awnings

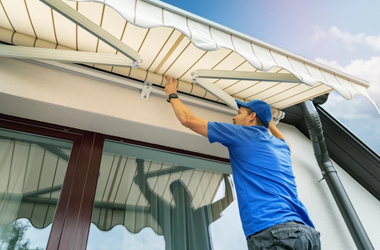
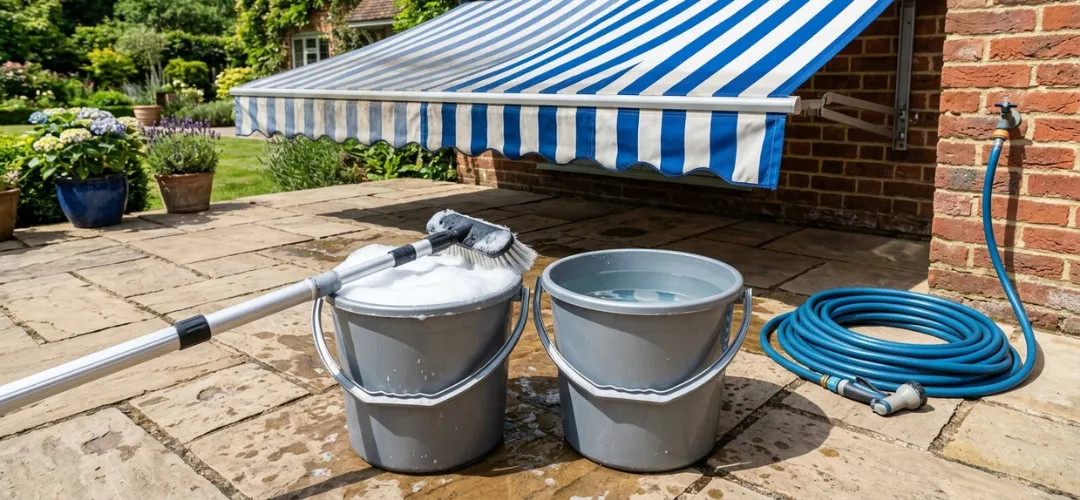
You step outside with your morning coffee and finally see it in the daylight. Your awning looks tired. Pollen has settled into the weave, a bird left a calling card near the edge, and a few dingy streaks run down the front like the fabric gave up. So you wonder, what is the cleaning trick the pros actually use? Most people grab one bucket and a brush, and that is exactly where things go wrong. The 2 bucket wash method is the simple fix. It matters most for delicate materials like Sunbrella fabric and vinyl awning panels. This guide walks you through how professionals clean without grinding dirt back in, fading the color, or cutting the life of the material short. Quick Answer: What the 2-Bucket Method Actually Does Let’s get straight to it, because you came here for a clear answer. So what is the two-bucket method for cleaning? It is exactly what it sounds like. You use two buckets instead of one. The first is your soapy bucket, filled with a gentle cleaning solution. The second is a rinse bucket holding plain water. Here is the part that does all the work. Before your mitt goes back into the soap, it gets dunked and swished in the clean water first. That second bucket catches the abrasive grit you just lifted off the fabric, so it never makes it back onto the awning. In a one bucket setup, that grit goes right back into your soap, and the next pass smears it across the material like sandpaper. That is what causes scratching and dull spots on delicate surfaces. Because the dirt has somewhere to go, this counts as a safe awning cleaning technique that protects the weave and the color at the same time. Why Delicate Awnings Need a Different Cleaning Approach Now that you know how the two buckets split the work, here is why your awning needs that kind of care in the first place. Awning fabric is not like a kitchen counter. It has texture. Those tiny fibers grab onto everything the air throws at them. Pollen settles deep into the weave. Dust packs in. Tree sap gets sticky and traps even more debris. And bird droppings? They are acidic, so they sit there quietly eating at the finish. Proper awning cleaning is less about elbow grease and more about lifting grime away instead of pushing it around. That gentle approach is what keeps the color bright. This is also why so many awnings fade and wear out years too early. The damage is rarely from the weather alone. It builds up wash after wash, when cleaning your awning gets done the rough way. The fibers fray, the protective coating thins, and the fabric starts looking chalky. Switch to gentle cleaning for awnings and the math flips in your favor. Less abrasion means less fading, fewer thin spots, and a finish that holds up. Do it right and you genuinely extend awning lifespan by years, which is a real return for a $30 setup. The Tools Professionals Use Before They Start Before any pro touches the fabric, they lay out their gear. A little prep here saves a lot of frustration later, and honestly, you probably have most of this already. Here is what goes into a proper two bucket wash kit: Most awning cleaners you find at the store fall into two camps: gentle formulas built for delicate weaves, and aggressive ones meant for concrete and siding. You want the first kind. The best cleaning solution for delicate awnings is almost always a mild, pH neutral mix rather than anything that foams up like industrial degreaser. Step by Step: The 2-Bucket Awning Cleaning Method With your buckets filled and your gear ready, here is the process from start to finish. Follow the order. The sequence is what makes the whole thing work. Step 1: Choose the Right Day and Fully Extend the Awning Timing matters more than people think. Pick an overcast day or a cool morning, and stay out of direct sunlight. Why? Because heat dries soap fast. If the sun bakes the suds before you can rinse, you get streaks and water spots that are a pain to remove. Then unroll the awning all the way so every inch is reachable and flat. Step 2: Pre-Rinse Loose Dirt First Never start scrubbing dry fabric. Give the whole awning a gentle pre-rinse with your low-pressure hose first. This knocks off the loose dirt, the pollen, and the dry leaves before your mitt ever touches the surface. Skip this and you are just grinding that debris in. Keep the water soft and even, top to bottom, and let gravity carry the grime down and off. Step 3: Wash With the Soap Bucket Dip your mitt into the soapy bucket and start at the top. Work in sections, using slow, overlapping passes in straight lines rather than circles. Straight strokes hide better if any fine scratch ever shows. The whole point of this awning cleaning method is a light touch. Let the soap do the lifting and resist the urge to bear down hard. This is soft washing awnings, not scrubbing a driveway, so easy pressure wins every time. Step 4: Rinse the Mitt in the Clean Water Bucket Here is the move that separates this from an ordinary wash. After every section, do not dunk your dirty mitt straight back into the soap. Swish it hard in the rinse bucket first. Agitate it against the bottom to shake the grit loose, wring it out, and only then reload it in the soapy bucket. That clean water bucket is where the dirt goes to die, which keeps your soap clean and your fabric safe. Step 5: Final Rinse From Top to Bottom Once the whole awning is washed, rinse it thoroughly with the hose. Go top-to-bottom rinse style, letting the water sheet down and carry every last bit of suds away. Do not leave soap

Read More →
How Awning Repair Saves You 60% Compared to Buying New

You walk outside on a sunny morning, look up at your patio awning, and notice it. A tear in the fabric. A sagging corner. Maybe the motor stopped working halfway through retracting. Your first thought is probably dread, followed quickly by “How much does it cost to fix an awning?” Here is the good news. Awning repair is almost always cheaper than buying a whole new unit, often by a staggering 60%. The reason is simple. The most expensive parts of your awning are the metal frame, the motor, and the mounting hardware, and those usually outlast the fabric by years. Why replace everything when only one piece is broken? This guide walks you through why deciding to repair awning instead of replacing makes financial sense, what common fixes actually cost, when should you repair an awning instead of replacing it, and how to know when replacement is the smarter call. The Short Answer: Why Repair Usually Saves You 60% Let us get straight to the number you came for. How awning repair saves money compared to buying new awning comes down to one simple fact. You already own the expensive parts. A brand new awning can run anywhere from $1,200 to $6,000 depending on size, material, and whether it is motorized. That cost includes the aluminum frame, the fabric, the mounting hardware, the motor or manual arms, and installation labor. Now ask yourself this. If your frame is still straight and your motor still works, why would you pay for those parts again? Here is the math that matters. Option Typical Cost Range What You Pay For Full awning replacement $1,200 – $6,000 Frame + fabric + motor + hardware + installation Fabric only replacement $350 – $1,200 New fabric + labor to swap it Minor tear repair $10 – $30 Patch kit or tape Motor replacement $285 – $625 Just the motor, keep everything else Hardware fix (remote, gear, arm) $35 – $300 Single component only The pattern is obvious. Save money with awning repair instead of replacement by targeting only what is broken. The frame and motor carry the highest replacement costs, but they are also the longest lasting parts. Fabric wears out first. Hardware fails occasionally. But the backbone of your awning often has years of life left even when the cover looks terrible. Think of it like a car. If your tire goes flat, you do not buy a whole new vehicle. You replace the tire. The same logic applies here. Cost of awning repair is almost always a fraction of full replacement, and that gap is where your 60% savings live. How an Awning Works (and Why That Matters for Your Wallet) Before we talk about saving money, you need to know what you are actually paying for. An awning has three main parts, and understanding them explains why repair is so much cheaper than replacement. The Frame (The Skeleton) This is the aluminum or steel structure that holds everything up. It attaches to your house, supports the fabric, and bears the weight of wind, rain, and snow. Frames are built to last and a good quality aluminum frame can easily survive 15 to 25 years. Unless it is bent, cracked, or corroded, your frame does not need replacing. This is the single biggest reason to repair instead of buying new. You already own the expensive skeleton. The Motor or Arms (The Muscle) For retractable awnings, this is either an electric motor (motorized) or a set of manual arms with springs (manual). The motor costs $285 to $625 to replace. The arms and gears cost $35 to $300 to fix. But here is the key. These parts fail sometimes, but they fail less often than fabric. A motor that burns out after eight years does not mean your whole awning is trash. Swap the motor. Keep the rest. The Fabric Cover (The Skin) This is what you actually see. The fabric takes a beating every single day. UV rays, rain, wind, bird droppings, tree sap, and temperature swings. Acrylic fabric lasts 8 to 12 years. Vinyl lasts 10 to 15. Polyester is somewhere in between. The fabric is almost always the first thing to go, which is perfect because it is also the cheapest part to replace. A full fabric swap runs $350 to $1,200, far less than a $3,000 new unit. Answering “how awning works” is simple. The skeleton holds up the skin, and the muscle moves it. When the skin wears out, you do not throw away the skeleton. You just recover it. That is where the 60% savings come from. Awning Repair Cost Breakdown: Where the Savings Actually Come From Now that you understand the three main parts of an awning, let us talk dollars. The table below shows what each common repair typically costs compared to a full replacement. Repair Type Typical Cost Range Savings vs. Full Replacement Full awning replacement $1,200 – $6,000 0% (baseline) Fabric only replacement $350 – $1,200 60% to 80% Motor replacement $285 – $625 75% to 90% Awning frame repair $300 – $500 85% to 90% Lateral arm repair $110 – $300 90% to 95% Remote control replacement $35 – $80 98%+ Worm gear replacement $100 – $300 90% to 95% Small tear patch $10 – $30 99%+ Fabric Only Replacement (the biggest saver) This is where the 60% figure comes from. Swapping just the fabric costs a fraction of a full unit because you reuse the frame, motor, and mounting hardware. Material choice shifts the price: vinyl runs $200 to $400, acrylic coated polyester runs $150 to $250, and cotton canvas runs $100 to $200. Even at the high end, you are still saving thousands. Damaged Awning Fix for Small Problems Not every repair requires professional help. Torn awning fabric under two inches can be patched with UV resistant tape or a vinyl patch kit for $10 to $30. Worn seams can be restitched with heavy marine grade thread for under $20.

Read More →
How Wind Load Affects Awning Design: What Most Installers Don’t Explain

You are sitting on your patio enjoying a drink when a sudden gust of wind comes out of nowhere. The awning fabric snaps tight, the frame groans, and you watch your shade structure start shaking like it wants to take flight. Most homeowners never think about wind resistance until that moment, but by then it is too late. The problem is that awning installers rarely explain the physics behind what makes an awning fail or survive. They mount it, collect your money, and leave you guessing when the weather turns. Wind does not care about your warranty or how much you paid for the awning, it only cares about how well it was designed and installed. So how windy is too windy for an awning and what awnings can withstand wind before they become a flying hazard? The answers are not as simple as a single number. This guide breaks down what most installers never explain about wind load and why your awning might be one strong gust away from disaster. What Is Wind Load and Why Does It Matter for Awnings? Before we get into specific wind speeds and product ratings, you need to understand one simple concept. What is wind load in awning design? It is the force that moving air places on your awning’s fabric, frame, and mounting hardware. Think of it like this. Your awning works as a shade on a calm day, but when the wind picks up, that same fabric turns into a sail. And sails are designed to catch wind, which is the last thing you want attached to your house. The problem starts because most people only think about the awning itself, not the invisible force working against it. Wind load on awning calculations take into account the size of the fabric surface, the angle it sits at, how far it projects from the wall, and even the type of fabric. The difference between a safe awning and a failed one often comes down to whether the installer bothered to calculate wind load on awning before bolting it to your house. Without that calculation, you are guessing. And guessing with wind loads is how awnings end up on the ground or hanging sideways after the first real storm. How Wind Actually Affects Your Awning (It’s Not Just About Downforce) Most people assume wind pushes down on an awning. That is not the whole story. In fact, the more dangerous force is the opposite. Wind uplift forces on awnings happen when air moves over or under the fabric, creating suction that pulls the awning upward. Imagine holding a piece of paper flat in a breeze. It does not push down, it lifts. The same principle applies to your awning. How wind affects awnings comes down to a few key factors. Flat vs Angled Installation A flat awning with a shallow pitch allows wind to get underneath, where it gets trapped and creates upward pressure. Angled awnings allow wind to flow over the top instead of getting caught underneath. Projection Length The lever effect is simple physics. An awning that projects six feet from your wall creates leverage at the mounting points. A ten foot projection multiplies that force even more. What wind speed can an awning withstand depends largely on how far it sticks out. Shorter awnings almost always handle wind better. Location and Surroundings An awning installed on an exposed wall faces different wind pressures than one tucked into a courtyard. Wind swirls around buildings, accelerates through narrow gaps, and hits from unexpected angles. Wind pressure on fabric structures is not constant or predictable, which is why awnings fail in ways that surprise homeowners. Fabric Tension and Type Loose fabric catches wind and billows, which acts like a whip against the frame. Tight fabric allows wind to flow across the surface more smoothly. Heavier fabrics also resist flapping better than lightweight materials. The Wind Speed Rating Problem – What Most Manufacturers Won’t Tell You You have seen the numbers in product brochures. This awning can handle 30 mph winds. That one claims 40 mph. But what is the wind speed rating for awnings? And can you trust those numbers? The honest answer is more complicated than most homeowners realize. Ratings Assume Perfect Installation Those wind speed ratings assume your awning is mounted into solid structural framing, not just siding or brick veneer. They assume the hardware is perfectly aligned and torqued. They assume the fabric tension is perfect. In the real world, none of those conditions are guaranteed. Outdoor awning wind rating numbers can be misleading without context about how your awning was installed. The Rating vs Reality Gap A 30 mph rating does not mean your awning is safe the moment the wind hits that speed. It means the awning was tested in a controlled environment under ideal conditions. Gusts, direction changes, and nearby structures that funnel or redirect wind all change how your awning performs. Load-bearing capacity of awnings is not a switch that flips from safe to unsafe at a certain number. It is a gradual scale, and every installation is different. What to Look for Instead Rather than chasing a high number, ask your installer for the canopy structural design specifications. What is the frame made of? How are the arms reinforced? What is the actual breaking point of the mounting hardware? A well built awning with a modest rating will outlast a cheap awning with an inflated number every time. High wind awnings earn that label through better engineering, not bigger claims. Awning Design Features That Improve Wind Resistance Not all awnings are built the same. Some are designed to handle wind, while others are barely sturdy enough for a breezeless afternoon. Awning design for wind resistance starts with the right frame and fabric choices before you even think about mounting. Frame Material and Arm Design Aluminum frames are lighter than steel but can still be strong when engineered correctly. The arms that hold your awning

Read More →
7 Structural Factors That Determine Whether an Awning Lasts 3 Years or 15 Years

You finally saved up for that gorgeous new patio awning you’ve been dreaming about all winter. You find a style you love, click buy, and it looks flawless on day one. But what that canopy looks like on day one tells you absolutely nothing about year four. While your awning turns into a torn, sagging, rusted eyesore, your neighbor’s patio looks brand new for over a decade. The difference isn’t just luck or how often it rains. The line between an awning that lasts 3 years and one that thrives for 15 years comes down to a few critical building choices made behind the scenes. This guide breaks down the 7 structural durability factors that decide the true awning lifespan, helping you shop smart so you don’t waste your money. 1. Frame Material: Aluminum vs. Cheap Plastics and Thin Steel The skeleton of your shade system handles all the heavy lifting. When strong winds kick up unexpectedly, a weak frame will bend like a cheap umbrella. Cheap units use thin steel that rusts the second the coating scratches, or plastic joints that snap under pressure. To get a true 15-year awning, you want a frame made of thick, powder-coated aluminum. It is lightweight, completely immune to rust, and naturally flexes without breaking when nature throws a tantrum. Frame Material Expected Lifespan Rust Resistance Wind Performance Thin-Gauge Steel 2–4 Years Low (Rusts quickly) Poor (Bends easily) Plastic/PVC Components 1–3 Years High Very Poor (Snaps) Powder-Coated Aluminum 12–15+ Years Excellent (Immune) Outstanding 2. Fabric Engineering: Solution-Dyed Acrylic vs. Polyester Ever see a shade canopy that looks completely washed out, grey, and paper-thin after one summer? That is the result of using cheap polyester. The sun literally bakes the strength right out of the material until it rips like tissue paper. The gold standard for a long-lasting patio canopy is solution-dyed acrylic fabric. Instead of printing the color onto the top layer, the color is mixed directly into the liquid fibers before they are even spun into yarn. 3. Arm Assembly and Spring Tension Systems If you are looking at a retractable awning option, the arms are the most common point of total system failure. Cheaper awnings use simple rubber bands or light cables inside the arms to push the fabric out. Over time, these lose tension, leaving you with a saggy awning that collects rainwater. High-end patios rely on heavy-duty, dual-cable configurations or industrial-grade chain links inside the arms. These heavy-duty springs maintain intense, consistent tension for thousands of open-and-close cycles. If you are wondering how to choose an awning that lasts, look closely at the elbow joints of the arms. If those joints look thin or are held together by plastic caps, step away. You want solid forge-aluminum joints that can take a beating from the wind. 4. Thread Quality and Seam Construction It sounds minor, but the thread holding the entire canopy together usually fails long before the actual fabric does. Standard sewing thread rots quickly under constant exposure to rain, pollution, and intense afternoon heat. Once the top seam splits, the whole cover catches the wind like a sail and tears away. Premium manufacturers use specialized PTFE (Teflon-based) thread. This specific material is completely immune to UV rays, acid rain, and extreme temperature swings. What to look for: Check if the seams are chemically welded or double-stitched with marine-grade thread. If the stitching looks like something on a cheap pair of jeans, it won’t survive five winters. 5. Mounting Hardware and Brackets An awning is only as strong as the wall it is attached to. A heavy gust of wind applies hundreds of pounds of lifting force to the structure. If the brackets are small or made of cheap pot metals, they will rip right out of your siding, causing massive damage to your home. This is a major structural durability factor that people skip during a backyard awning comparison. Heavy-duty installations require thick structural steel wall brackets and heavy masonry or wood sleeve anchors. 6. Wind Resistance Rating and Built-In Safety Features Some awning units are built to handle a gentle summer breeze, while others can take a serious storm. Cheaper retail store models rarely feature an official wind rating, meaning they are a gamble the second the weather turns ugly. A professional-grade unit comes with a certified wind class rating, often proving it can handle winds up to 20 or 30 miles per hour without taking damage. For the ultimate piece of mind, look for smart automated features. A built-in motion sensor can detect when the frame starts shaking too violently from wind gusts. The system then automatically triggers the motor to roll the fabric up safely before any damage can occur, protecting your investment even when you are away from home. 7. Coating and Finish: Powder Coating vs. Liquid Paint The metal frame needs protection just as much as the fabric does. Cheap models use standard spray paint or basic liquid finishes that chip off the moment a stray tree branch taps the frame. Once the bare metal meets the air, moisture creeps in and starts the destruction process. Top-tier frames undergo a detailed multi-stage powder coating process. The protective powder is electrostatically charged onto the aluminum and baked in an industrial oven to create a hard, thick, plastic-like shield. This advanced finish is highly resistant to scratching, color fading from the sun, and salt-air corrosion if you live near the coast. It keeps the framework looking pristine and working smoothly without sticking or squeaking for decades. Time to Make Your Choice When it comes to shade, you truly get what you pay for. Avoiding a rusted, saggy mess means ignoring the cheap price tags and focusing on what matters under the hood. By choosing thick aluminum frames, solution-dyed fabrics, and heavy-duty hardware, you guarantee a beautiful, long-lasting patio canopy that lasts 15 years instead of just 3. If you want to skip the guesswork and make sure you get an awning that lasts, The

Read More →
What Causes Awning Sagging and How Repairs Can Fix It

You step outside on a sunny Saturday morning, coffee in hand, ready to enjoy your patio. But something looks off. Your awning is drooping in the middle like a tired shoulder. Water from last night’s rain is still sitting there in a heavy pool, and you find yourself asking the same question homeowners everywhere have asked: why is my awning sagging? Here is the thing. You are not alone in wondering what causes awning sagging and how repairs can fix it without costing a fortune. Most people assume a sagging awning means full replacement. But that is rarely true. The fabric, the arms, the springs, they can almost always be brought back to life. In this blog, we will walk through exactly why awnings lose their tension, which fixes actually work, and when you finally need to call in help for awning repair. No guesswork. Just answers that keep your shade where it belongs. Why Is Your Awning Sagging? Let us start with the obvious question you came here to answer. Why is my awning sagging? The short version is this: your awning lost the battle between tension and gravity. Every awning, whether fixed or retractable, relies on a careful balance. The fabric needs to stay stretched. The frame needs to stay straight. The springs, if you have a retractable model, need to keep pulling everything tight. When any part of that balance breaks, you get droop. Think of it like an old t-shirt that has been washed too many times. The collar loosens and the fabric no longer snaps back. That is exactly what happens with awning fabric sagging over months of sun, rain, and wind. But here is the good news. Most awning problems are not fatal. They are mechanical. And mechanical things can be adjusted, tightened, or realigned without ripping the whole thing off your house. In the next section, we will break down exactly what causes the looseness so you know which fix applies to your situation. What Causes Awning to Sag Over Time? Let us get specific. You cannot fix something until you know why it broke in the first place. Water Pooling and Rain Damage You see that dip in the middle of your awning after a storm? That is not just annoying. That is weight. A single gallon of water weighs over eight pounds. Now imagine a heavy summer downpour dumping ten or fifteen gallons onto your fabric because the pitch was too flat to let it run off. That is how awning damage starts. The fabric stretches. The seams groan. And over time, that stretch becomes permanent. Wind Stress and Fabric Strain The wind does not hit your awning like a polite guest. It grabs it. It whips it. It yanks the fabric in directions it was never designed to go. One strong gust can overextend a retractable arm. Repeated gusts loosen every joint and bracket holding the whole thing together. Before you know it, your once straight shade now looks like it is waving at the neighbors. Weak Spring Tension (Retractable Systems) If you have a retractable awning, the magic happens inside that roller tube. Springs keep the fabric tight. They provide the snap when you open it and the control when you close it. But springs get tired. After a few years of expanding and contracting, they lose their grip. That leads to classic retractable awning problems like fabric that hangs loose even when fully extended or an awning that refuses to roll up all the way. The spring is still there. It is just not springing like it used to. Improper Installation or Misalignment Here is a hard truth. Some awnings sag the day they are installed. Not because of bad parts, but because someone rushed the job. Brackets mounted unevenly. Pitch set too flat. Arms that are not parallel. These small mistakes create uneven tension across the fabric. One side pulls tighter than the other. The loose side sags. And that sag gets worse with every rainstorm and every gust of wind. Fabric Aging and Material Wear Nothing lasts forever. Sun breaks down polyester and acrylic. UV rays fade the color first, then weaken the fibers. Rain and humidity invite mildew that eats away at thread and seams. This is what causes awning fabric to loosen naturally over five, seven, or ten years. The material stretches. It loses its original shape. And no amount of tightening can fully reverse decades of weather exposure. At that point, you are not looking at an awning repair. You are looking at new fabric. How to Fix a Sagging Awning Without Replacing It Now for the part you actually want. The fixes. No replacement needed. Just your hands, a few basic tools, and about an hour of your weekend. Before you do anything, ask yourself this: can a sagging awning be repaired? In most cases, yes. Absolutely. The only time you cannot is when the fabric is torn beyond patching or the frame is bent like a pretzel. Everything else? Adjustable. Adjusting Awning Tension Let us start with the most common fix. The answer to how to tighten a sagging awning depends on whether yours is retractable or fixed. For retractable awnings, fully extend the unit. Look at the roller tube. Is the fabric wrapping over the top of the tube or spooling underneath? It should go over the top. If it is rolling under, you have a reverse roll situation. You can fix that by fully extending, removing the fabric from the roller, and rerolling it correctly. Sounds fussy. It works. For fixed awnings, tension is usually adjusted at the arms. Look for adjustment screws or bolts where the arm meets the wall bracket. A few turns can pull everything tighter. Go slowly. Quarter turns only. Then check the fabric. Fixing Water Pooling Issues Water pooling is not just a sagging problem. It is a future collapse problem. The fix is simple. Change the pitch. Most retractable awnings let you

Read More →
awning-making
What Most People Get Wrong About Awning Making (And How to Avoid It)

Home How Often Should Commercial Buildings Be Washed? A Practical Guide You spent a weekend building that awning. Cut the fabric, assembled the frame, and mounted it proudly over your patio. Six months later, it is sagging in the middle, the seams are leaking, and one corner is already pulling out of the siding. You are not unlucky. You just made the same mistakes everyone makes. If you have ever thought about “what are the most common mistakes in awning making?”, you’d be surprised to know that they are not complicated. Wrong materials for your climate, bad measurements, frames that cannot handle wind, and seams that were never sealed are among those simple mistakes people make during awning making. Worry not because this blog walks you through the five biggest screw ups people make when making your own awning and exactly how to avoid them. So without beating around the bush, let’s get into it. Why Most People Get Awning Making Wrong from the Start Here is the problem. People think an awning is just fabric on a stick. It is not. An awning is an engineered outdoor structure. It has to hold up against wind that wants to rip it off your house. Rain that wants to pool and rot everything. Sun that wants to fade and crack every thread. And snow that adds hundreds of pounds of weight overnight. Most people skip the engineering part entirely. Making awnings starts with understanding forces, not just picking pretty fabric. How much wind can your frame handle? Does your mounting surface have studs or just hollow siding? What happens when wet fabric doubles in weight? Never thought of it this way, did you? DIY awning making fails because it treats these questions as optional. They are not. The difference between a poor quality awning that fails in one season and a durable awning system that lasts ten years is not luck. This is exactly why making an awning without understanding your local climate is like building a boat without checking if the lake has water. You will learn the hard way. So before we get into the specific mistakes, accept this truth. Your awning is not a craft project. It is a structural addition to your home. Treat it that way. Mistake #1 – Choosing the Wrong Materials for Your Climate You can build the perfect frame and measure everything twice. But pick the wrong fabric or metal, and your awning is doomed from day one. What materials are best for awning making? The answer depends entirely on where you live. Fabric Choices Solution dyed acrylic (like Sunbrella) is the gold standard. The color goes all the way through the fiber, so it does not fade. It breathes, which prevents mildew. It blocks UV without cracking. Perfect for hot, sunny climates. Solution dyed polyester is similar but slightly less breathable. It holds up well in humid areas and resists stretching. Good all around choice. Vinyl coated polyester is waterproof and tough. Great for rainy climates. But it does not breathe, so trapped moisture can become a problem in humid areas. Cheap canvas or untreated polyester fades within a year, rots when wet, and stretches permanently. This is what most poor quality awning nightmares are made of. Frame Materials Aluminum is the winner. Lightweight, rust proof, strong. A durable awning system almost always starts with an aluminum frame. Steel is strong but heavy. It rusts unless perfectly coated. One scratch and corrosion starts. Wood looks beautiful but requires constant sealing. Rot is always a threat. Skip it unless you love maintenance. Making an outdoor awning for a coastal home needs different materials than one for the desert. Salt air eats cheap metal, intense sun destroys cheap fabric, and rain and snow demand waterproofing and sturdy frames. Choose custom awning making materials based on your worst weather, not your best day. Mistake #2 – Ignoring Weather and Structural Engineering You picked great materials. Now let us talk about what the weather will do to them. Ever wondered why do some awnings get damaged quickly? This is because they were never built for what actually hit them. Here’s what that means. Wind is Not Your Friend A flat awning acts like a sail. Even a 20 mph breeze puts hundreds of pounds of lift on your frame and mounting brackets. A gust during a summer storm can rip a poorly secured awning right off the house. Your frame needs cross bracing. Your mounting hardware needs to hit studs, not just siding. And your fabric needs to be taut enough not to flap, because flapping loosens everything over time. Water and Snow Are Heavy Wet fabric weighs two to three times more than dry fabric. Now add snow on top of that. A retractable awning left extended during a winter storm can gather enough weight to bend the frame or pull the mounts straight out of the wall. That is why fixed awnings need a proper pitch, usually 14 to 20 degrees. Steep enough for water to run off, flat enough to still provide shade. Too flat and water pools. Too steep and you lose coverage. The Reinforcement You Actually Need If you live in a windy area, every joint needs gussets or corner braces. If you get heavy snow, your frame needs thicker wall tubing. If you are near the coast, stainless steel hardware is not optional. Making an awning without accounting for your local weather is gambling. Sometimes you win. Usually, you lose. Mistake #3 – Incorrect Measurements and Fit You can build the strongest awning in the world. If it does not fit your space correctly, it is useless. Measure wrong and your awning installation becomes a nightmare. Too narrow and you get zero shade during parts of the day. Too wide and you hit gutters, lights, or neighboring windows. Too short on projection and rain blows right under. Too long and the weight is unbalanced. How to Measure Properly Width

Read More →
commercial-buildings
How Often Should Commercial Buildings Be Washed? A Practical Guide

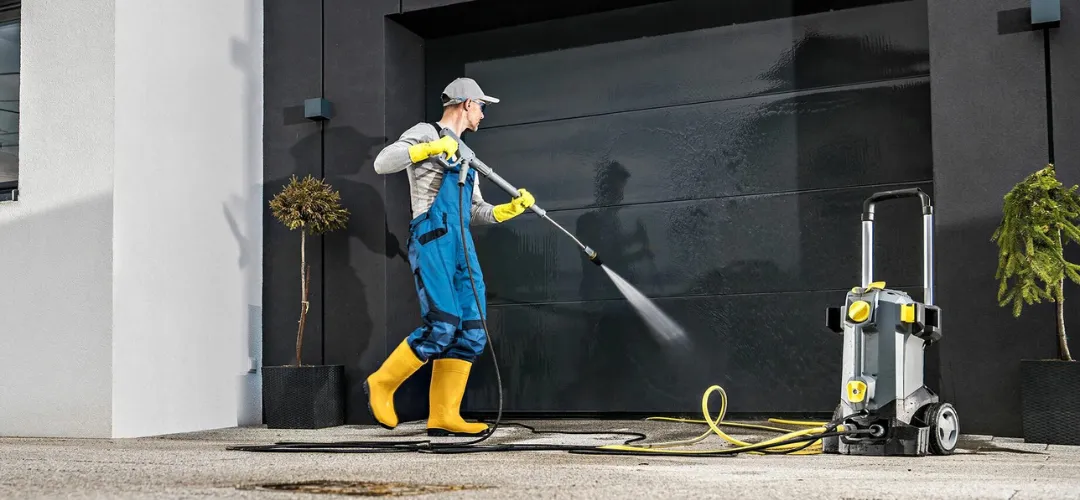
Home How Often Should Commercial Buildings Be Washed? A Practical Guide You’ve seen it happen. A business with a great reputation, solid reviews, and happy customers. But the building looks tired. Faded paint, streaked windows, and walkways that haven’t seen a pressure washer in years. Customers don’t say anything, but they notice. And some of them don’t come back. If you’re wondering “How often should commercial buildings be cleaned?”, this guide gives you a straight answer. No fluff. Just practical advice based on your building type, location, and how you use the space. What Is Commercial Building Washing? Let’s start with the basics. Commercial building washing is exactly what it sounds like. Professional cleaning of the exterior surfaces of commercial properties. Walls, windows, walkways, parking areas, and any other surface exposed to the elements. This isn’t the same as the janitor who empties your trash cans every night. Exterior building cleaning focuses on what’s outside. The stuff that weather, pollution, and foot traffic leave behind. Building washing services typically include: Service What It Covers Pressure washing Concrete, brick, stone, parking lots, sidewalks Soft washing Siding, stucco, painted surfaces, roofs Window cleaning Exterior glass, frames, sills Gutter cleaning Removing debris, checking downspouts Graffiti removal Paint, markers, adhesives Some people confuse commercial building pressure cleaning with a simple hose-down. It’s not. Professionals use the right pressure for each surface. Too much force damages brick and siding. Too little leaves the grime behind. The right approach makes the difference between a clean building and a damaged one. How Often Are Commercial Buildings Cleaned? How often should you clean the outside of your commercial building? The short answer is once or twice a year for most properties. But that’s just a starting point. The right frequency depends on where you are, what kind of building you have, and how much traffic it sees. For most office buildings, once a year in spring is enough to wash away winter grime and prepare for summer. But if you’re near the ocean, salt spray eats away at surfaces faster. If you’re in a city with heavy pollution, soot builds up quicker. Here’s a quick reference: Building Type Recommended Frequency Low traffic / mild climate Once per year Moderate traffic / standard conditions 1 to 2 times per year High traffic / coastal or polluted area 2 to 4 times per year Restaurants and food service Quarterly or more Medical facilities Quarterly or more Industrial facilities with dust or residue 2 to 4 times per year At this point, it should be clear. Frequency of commercial building washing isn’t one-size-fits-all. A retail store with heavy foot traffic needs more attention than a warehouse in an industrial park. A restaurant needs more than a small professional office.  Factors That Affect Cleaning Frequency Not every building needs the same schedule. Here’s what changes the math. Location and Environmental Conditions Where your building sits matters more than anything else. Condition Impact Frequency Impact Coastal area Salt spray corrodes metal, etches glass Add 1-2 extra cleanings per year Industrial zone Soot, smoke, chemical residue 2-3 times per year minimum Rural area Pollen, dust, bird droppings Once per year usually sufficient Urban center Exhaust, graffiti, heavy foot traffic 2-3 times per year Shaded property Algae and moss growth Add seasonal cleaning Commercial buildings that need cleaning more often are usually in cities or near the coast. Pollution doesn’t take a break, and salt doesn’t stop eating away at surfaces just because you’re busy. Foot Traffic and Building Usage A bank lobby sees hundreds of people a day. A warehouse sees trucks and forklifts. A medical office sees sick patients. Each one leaves behind dirt, oils, and contaminants. Retail stores and restaurants need exterior cleaning every few months. Office buildings can often go once or twice a year. Industrial facilities with heavy dust or chemical exposure need quarterly attention. Weather and Seasonal Changes Winter leaves behind road salt and grime. Spring brings pollen that coats every surface. Summer heat accelerates mold and algae growth. Fall drops leaves that stain and clog. A good commercial building exterior cleaning schedule accounts for these cycles. Spring cleaning washes away winter residue. Fall cleaning prepares for the wet season. Building Material and Surface Type Brick absorbs stains. Glass shows every streak. Concrete holds onto oil. Painted surfaces fade and chalk. Each material needs different care at different intervals. Deep cleaning commercial building surfaces isn’t the same as routine washing. Some materials need gentle soft washing. Others can handle high-pressure cleaning. Matching the method to the material prevents damage. Regulatory and Image Requirements Healthcare facilities have compliance standards. Food service businesses face health inspections. Properties with high-end retail tenants have appearance requirements baked into their leases. If your building is client-facing, you can’t afford to let it look neglected. A dirty exterior tells customers you don’t pay attention to details. That’s not the message you want to send. Types of Commercial Exterior Cleaning Methods Not all cleaning is the same. The method matters as much as the frequency. Pressure Washing This is what most people think of when they imagine exterior cleaning. High-pressure water blasts away dirt, grime, mold, and loose paint. Commercial building pressure cleaning works best on hard surfaces. Concrete sidewalks, brick walls, parking lots, and metal fixtures can handle the force. The key is using the right pressure for each surface. Too much power etches concrete and damages brick. Soft Washing Some surfaces can’t take high pressure. Painted wood, vinyl siding, stucco, and roofs need a gentler touch. Soft washing uses low-pressure water combined with specialized cleaning solutions. The chemicals do the work, killing mold and algae at the root. The rinse is gentle enough to protect delicate surfaces. This method lasts longer too, because the cleaning agents keep killing growth for weeks after application. Deep Cleaning Methods Routine washing handles surface dirt. Deep cleaning commercial building surfaces goes further. It removes embedded stains, eliminates biological growth, and restores surfaces that look permanently discolored. Deep

Read More →
What to Check Before Hiring a Contractor for Awning Making

Home What to Check Before Hiring a Contractor for Awning Making You finally decided to add an awning. Something to shade the patio, keep the rain off the deck, maybe just make the place look a little sharper. You start calling contractors. Some sound great. Others not so much. And you realize you have no idea how to tell the good ones from the bad. If you’ve been asking yourself what questions should I ask a contractor before hiring, you’re not alone. Most homeowners don’t know what to look for until something goes wrong. By then, it’s too late. This guide walks you through exactly what to check for when hiring a contractor for awning making. No guesswork, just the stuff that actually matters. Understand Your Awning Needs Before Hiring Before you even start looking for a contractor, figure out what you actually want. Are you covering a residential patio or a commercial storefront? Do you need a retractable awning that pulls in and out, or a fixed structure that stays put year round? These choices affect everything from material selection to installation complexity. If you’re making a custom awning, you’ll need a contractor who does more than just install pre made units. Custom work requires precise measurements, fabric selection, and often unique mounting solutions. Making an outdoor awning for a restaurant or cafe has different requirements than one for a backyard deck. Commercial spaces need fire rated fabrics and sturdier frames. Residential projects have more flexibility. Some homeowners consider making your own awning as a DIY project. And sure, you can buy a kit online. But professional awning making services handle the details that DIY misses. Proper tension, correct slope for water runoff, secure mounting that won’t pull out of your walls. These matter. Knowing your needs upfront helps you find a contractor who specializes in exactly what you’re looking for. Check Experience and Specialization in Awning Making Not every contractor who says they can install an awning actually knows what they’re doing. A deck builder might hang a shade, but will it last? Probably not. Look for professional awning contractors who focus specifically on this work. Years in business matter, but so does the type of work they’ve done. Ask if they’ve installed awnings similar to what you want. Awning contractors and designers bring an extra layer of value. They don’t just install. They help you figure out what works for your space, what size makes sense, and which fabric holds up in your climate. An awning installer who has been around for a while has seen what fails. They know which materials crack in the sun, which frames rust, and which mounting methods hold up to wind. That knowledge saves you from expensive mistakes. Verify License, Insurance, and Legal Compliance This isn’t the fun part of hiring a contractor. But skipping it is how people end up in trouble. A valid awning contractor license shows the company meets basic professional standards. Requirements vary by state and city, so check what’s required where you live. A contractor who can’t produce a license probably has a reason. Insurance matters even more. If an installer falls off a ladder on your property, who pays the medical bills? If they drop a frame through your window, who covers the damage? Without proper coverage, that person could be you. Ask for proof of general liability insurance and workers’ compensation. A legitimate Awning company will provide these documents without hesitation. If they make excuses or say they’re “between policies,” move on. Review Previous Work and Customer Feedback Seeing is believing. Any contractor can talk a good game. But past work doesn’t lie. Ask for a portfolio of completed projects. Look for awnings similar to what you want. Pay attention to clean lines, straight mounting, and fabric that sits tight without sagging. These details separate professionals from amateurs. Online reviews help too. Check Google, Yelp, and the Better Business Bureau. But read between the lines. One angry customer might be unavoidable. A pattern of complaints about the same issue tells you something real. How do I know if an awning contractor is reliable? You ask for references and actually call them. Speaking with past customers reveals things reviews don’t show. Were they on time? Did they clean up after themselves? Did the awning hold up after a year of sun and rain? Evaluate Materials and Build Quality Your awning is only as good as what it’s made from. Cheap fabric fades in one summer. Weak frames bend in the first windstorm. Ask what fabric for making awnings they use. Look for solution dyed acrylic or polyester with UV inhibitors. These materials resist fading and hold up to weather. Avoid vinyl or cheap coated fabrics that crack and peel. The frame matters just as much. Powder coated aluminum resists rust. Stainless steel hardware prevents corrosion. Ask about thickness, gauge, and weight ratings. A frame that feels flimsy in the showroom won’t get stronger outside. Awning making contractor quality shows in the details. Double stitching on seams. Reinforced corners. Weather resistant zippers or Velcro on removable parts. These are signs of someone who builds to last, not just to sell. Ask the Right Questions Before Hiring You’ve done your research. Now it’s time to talk to contractors. Here’s what to ask. How long will the project take? Get a clear answer on contractors timing. When will they start? How many days on site? When can you expect completion? A vague timeline is a red flag. What materials will you use? Brand names matter. “Good quality” isn’t specific. Ask for manufacturers and model numbers. What does your warranty cover? Get it in writing. Fabric, frame, labor, and workmanship should each have clear terms. Do you use subcontractors? If yes, are they insured? Will the same crew be on site the whole time? Who pulls the permits? A reputable contractor handles this. If they tell you permits aren’t needed, check for yourself. Awning companies that answer these

Read More →
10 Common Dirt and Stains Found on Home Exteriors Explained

Home You step outside and notice it. Dark streaks running down your siding. A greenish tint on the north side of the house. Maybe some reddish-brown marks under the windows. You scrub at them, but they don’t budge. And you’re left wondering what exactly you’re looking at. If you’ve been asking yourself what are some common stains on home exteriors, you’re not alone. Most homeowners see these marks and assume it’s just dirt. But different stains have different causes. Some are harmless. Others can actually damage your siding, brick, or paint if left untreated. This guide breaks down ten of the most common dirt and stains on home exteriors. You’ll learn what they are, where they come from, and how to deal with them.  Why Exterior Surfaces Get Dirty You might think dirt just shows up because of wind and rain. And that’s part of it. But why does my house exterior get dirty so fast? It usually comes down to a few specific factors. Factor How It Affects Your Home Moisture & humidity Creates the damp conditions where algae, mold, and mildew thrive Shade & lack of sunlight North-facing walls and shaded areas stay damp longer, encouraging growth Trees & organic debris Leaves, pollen, and sap create food for stains; tannins leach onto siding Irrigation systems Sprinklers hitting the house leave mineral deposits and rust stains Pollution & environmental exposure Industrial fallout, exhaust, and airborne particles cling to surfaces Neglect Dirt that’s allowed to sit becomes embedded and harder to remove The good news is that understanding what are the different types of dirt found on house exteriors helps you target the right cleaning method. Algae needs a different approach than rust. Oxidation isn’t the same as dirt buildup. Once you know what you’re dealing with, the fix gets much simpler. Most stains start small. A little green on the siding here. A dark spot under the eaves there. But exterior house staining that goes untreated spreads. What begins as a cosmetic issue can turn into surface damage, especially on wood and painted surfaces where moisture gets trapped behind the stain. Regular cleaning isn’t just about curb appeal. It’s about protecting the materials your home is made of. 10 Common Dirt and Stains on Home Exterior Surfaces Let’s get into the actual stains. Here’s how to spot them, where they show up, and what they mean for your home. Algae You’ve probably noticed green or black slimy patches on the north side of your house or under shaded eaves. That’s algae. It thrives in damp areas that don’t see much sun, feeding on the organic components in siding and paint. Beyond looking unpleasant, algae holds moisture against your home’s surfaces, which can lead to paint failure and material deterioration over time. Soft washing with a bleach-based solution kills it at the roots; pressure washing alone often just knocks off the surface layer, letting it grow right back. Mold & Mildew Dark fuzzy spots spreading across your siding or a powdery gray-white film on wooden fences usually means mold and mildew. These fungi love damp, shaded areas with poor airflow. They don’t just look bad. Mold releases spores that can trigger allergies and respiratory issues, and on wood surfaces, they can cause rot. A mild detergent and water solution works for light cases, but established growth needs oxygen bleach or a specialized cleaner to kill the spores, not just wipe away the visible spots. Dirt and Grime That even gray film covering your siding isn’t just dust. It’s a mix of wind-blown particles, exhaust residue, and rain-splashed soil. Lower sections of the house get hit hardest, and horizontal surfaces collect everything that settles out of the air. Dirt itself isn’t damaging, but it traps moisture against your siding and gives algae and mold a place to start. A good pressure wash or even a garden hose with a cleaning attachment handles most of it, especially if you stay on top of it before layers build up. Rust Stains Those reddish-orange streaks running down your siding or driveway are rust. They often appear under metal railings, around light fixtures, or where sprinklers hit the house. Iron-rich water from irrigation systems can also leave these marks on concrete and stone. If you’re wondering what are the brown stains on the outside of my house, rust is a common culprit, though it’s more orange than brown. Rust doesn’t just stain, it can etch into porous surfaces like concrete and brick if left too long. A specialized rust remover works best; pressure washing alone often isn’t enough to break down the iron particles that have bonded with the surface. Oxidation If your vinyl or painted siding looks chalky or faded, you’re seeing oxidation. This white powdery residue happens when sun exposure breaks down the surface of the material over time. It’s most noticeable on darker colors and south-facing walls that get the most UV exposure. This is one of those exterior dirt types that isn’t actually dirt at all, it’s the siding itself deteriorating. Oxidation doesn’t wash off the way dirt does. Light oxidation can be cleaned with a pressure washer, but heavy oxidation may require professional treatment or, in severe cases, repainting or replacement. Water Stains and Mineral Deposits Those dark vertical streaks under your windows or white crusty buildup near gutters are water stains and mineral deposits. They happen when mineral-rich water runs down the siding and evaporates, leaving behind whatever was dissolved in it. This is one of the most common house exterior stains homeowners notice, especially after rainy seasons. These deposits can etch into glass and stain brick and concrete over time. Regular cleaning with a mild acid solution, like vinegar and water, prevents buildup from becoming permanent. The real fix is addressing where the water is coming from, often leaking gutters or irrigation heads hitting the house. Tannin Stains Those brown or rust-colored drip marks on your wood deck or the siding under a large tree aren’t from

Read More →